Understanding the Workflow
Smart Certificates works by connecting your Google Form responses to a certificate template in Google Slides™, generating personalized certificates automatically based on form input.
This section explains the flow of data and responsibilities of each component in the system.
Workflow Overview
The process follows this sequence:
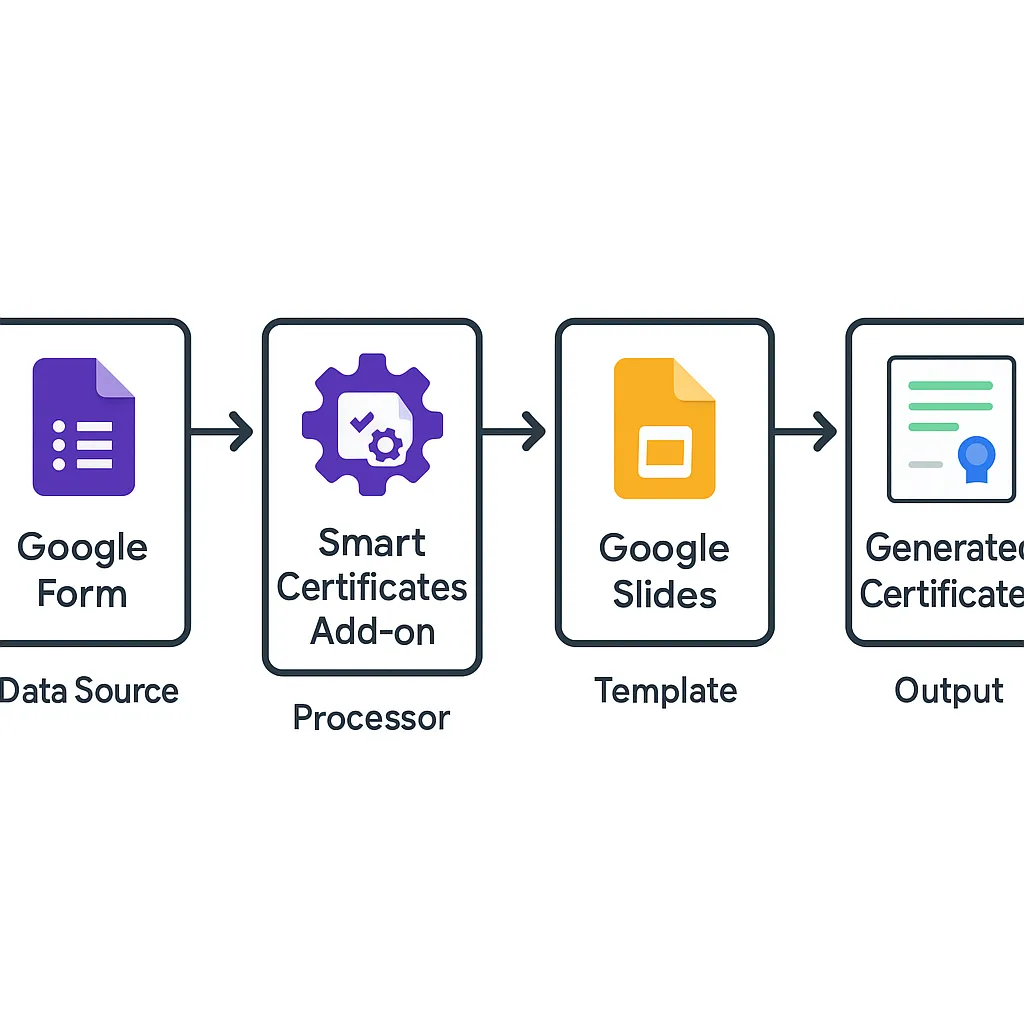
Google Form (Data Source) → Smart Certificates Add-on (Processor) → Google Slides (Template) → Generated Certificates (Output)
Component Breakdown
1. Google Form (Data Source)
This is where users submit their responses — such as name, email, score, etc. These responses serve as the input for certificate generation.
- You design the form with relevant fields (e.g., Name, Email, Course Completed).
- Responses are automatically captured and stored in the linked Google Sheet.
2. Smart Certificates Add-on (Processor)
The core engine that connects your form with the certificate template.
- Reads form responses
- Maps responses to placeholders in the template
- Applies logic (e.g., passing criteria)
- Handles certificate generation and delivery
3. Google Slides (Template)
Acts as the layout and design layer for the certificate.
- You create your own design or use a pre-made template
- Placeholders like
{{Name}}or{{Course}}are added where dynamic content will appear
4. Generated Certificates (Output)
Smart Certificates creates a personalized version of the template for each qualifying response.
- Certificates are saved as PDF or image files in Google Drive™
- Each file’s link is logged in the linked response sheet
- Emails with attachments are sent to recipients automatically
Visual Workflow
Here’s a diagram illustrating how the system works end-to-end:
💡 Tip: You can customize every part of the flow — from form questions to Slide design to delivery logic.
By understanding how each part of the workflow functions, you’ll be better equipped to customize and scale your certificate process.