Getting Started
Smart Certificates automates the creation and delivery of personalized certificates based on Google Form™ submissions. This guide walks you through the setup and configuration process.
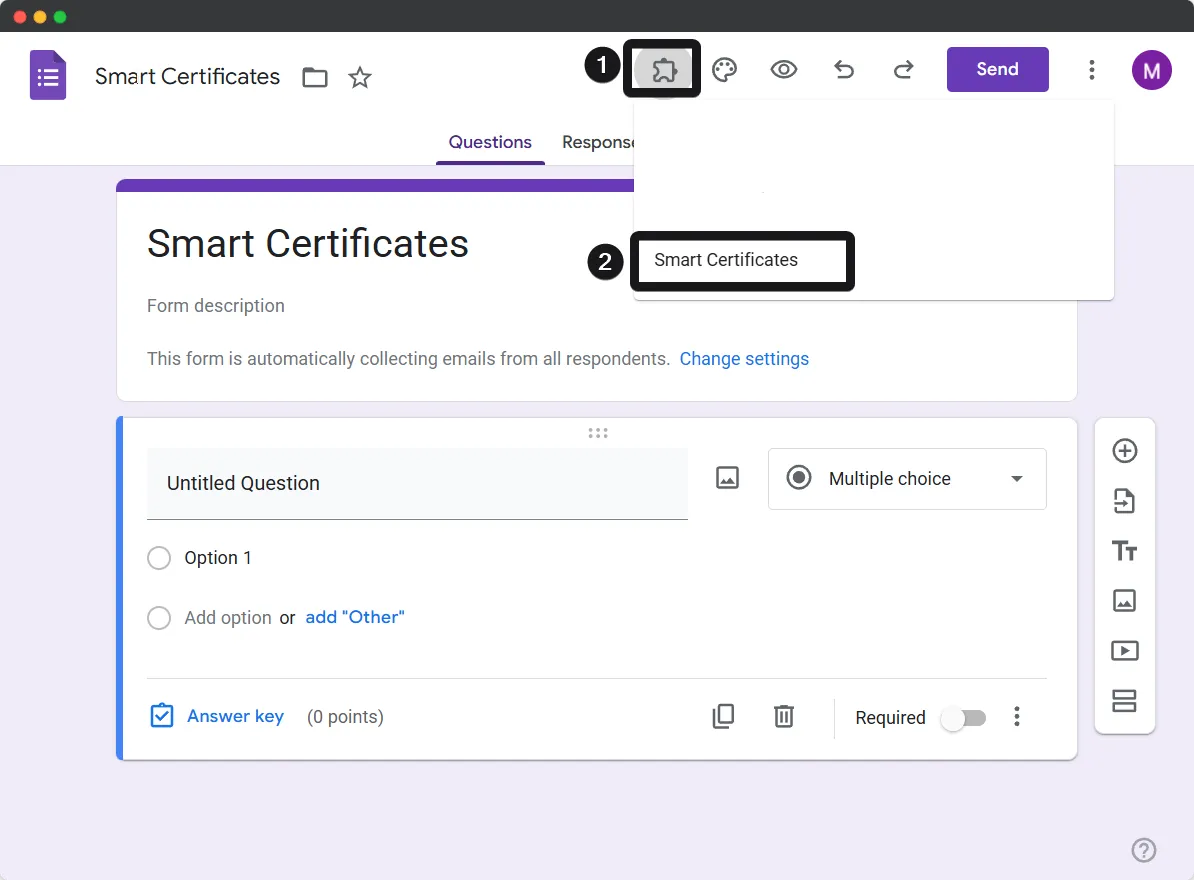
Launch the Add-On
In the Google Form editor:
- Click the Add-ons icon (puzzle piece).
- Select Smart Certificates from the list.
- Click Open from the popup.
Background Changes on First Launch
Upon initial launch, Smart Certificates will configure your form automatically:
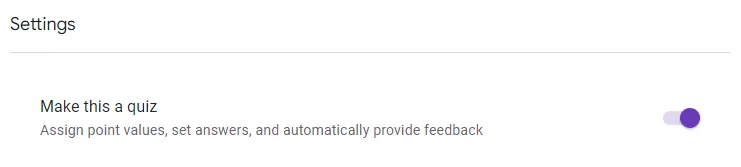
-
✅ Enables “Make this a quiz”
Ensures scoring is enabled for pass/fail conditions.
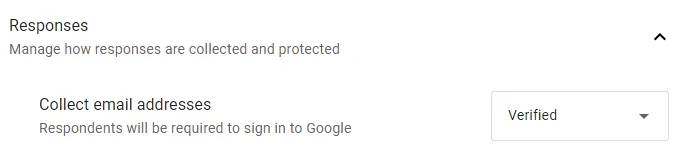
-
✅ Enables “Collect email addresses”
Ensures responses are associated with a verifiable email.
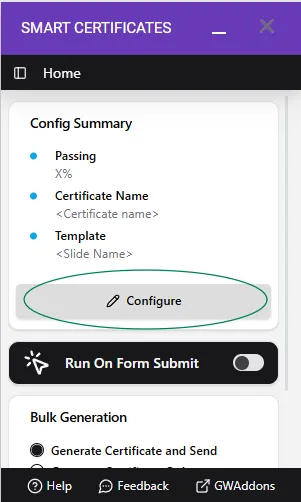
🧰 Usage Instructions
Configure Add-On
Click the Configure button to begin.
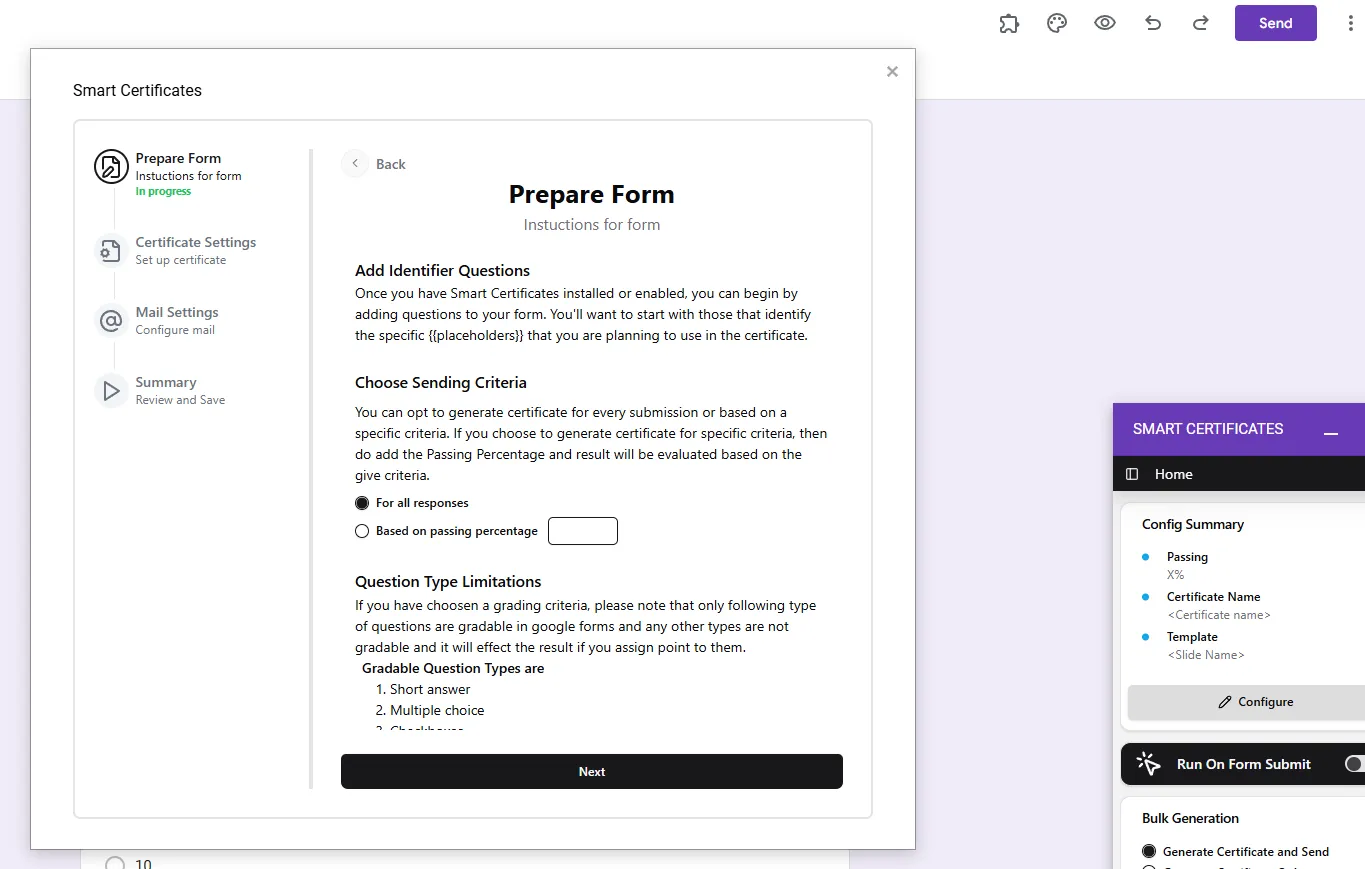
📝 Prepare Your Form
Follow the guided steps and save all settings.
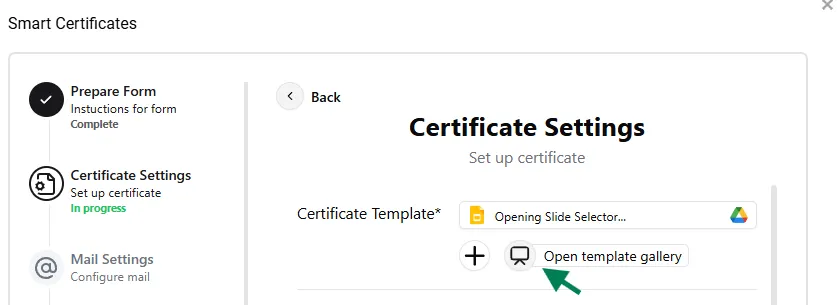
🪪 Certificate Settings
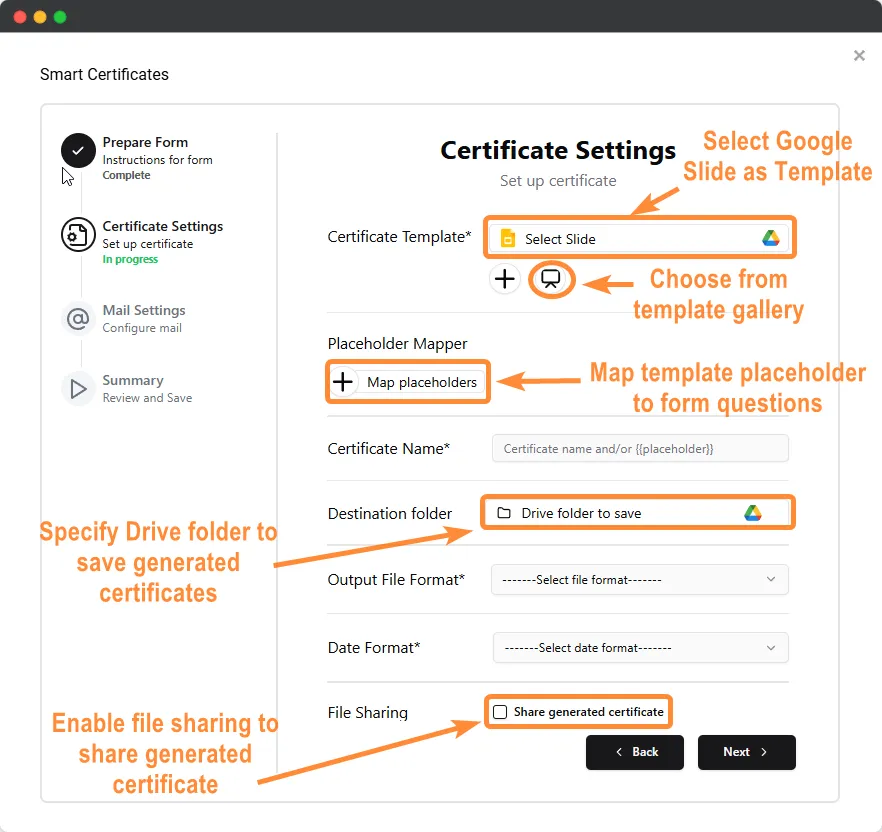
- Certificate Template – Select a Google Slides™ template for certificate generation.
- Placeholder Mapper – Use the ➕ button to map form fields to placeholders (e.g.,
{{Full Name}}). These placeholders are also usable in email content. - Certificate Name – Dynamic naming using placeholders.
- Destination Folder – Select a Google Drive™ folder to store the certificates.
- Output File Format – Choose between PDF or Image.
- Date Format – Select a date format that will appear on the certificate.
- Next to Save – Click “Next” after completing this section.
📬 Mail Settings
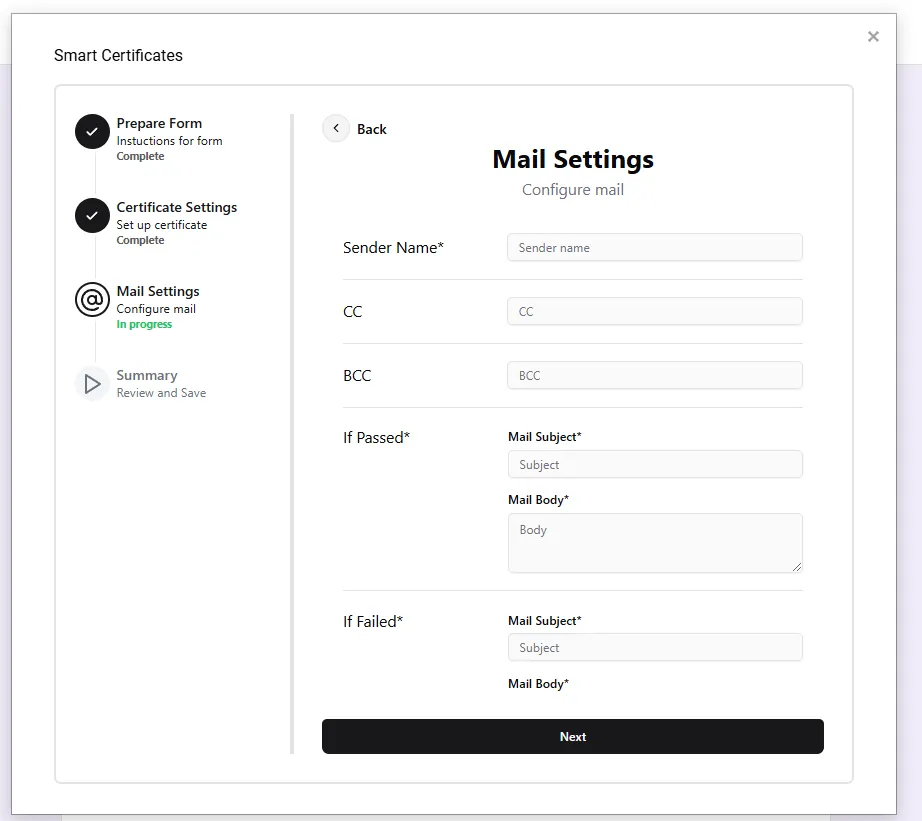
- Sender Name – Appears in the “From” field of the recipient’s inbox.
- CC / BCC – Add recipients to be copied or blind-copied.
- Mail Subject (Pass/Fail) – Customize the subject line depending on the outcome.
- Mail Body (Pass/Fail) – Customize the body content for both pass and fail scenarios.
- Save Mail Settings – Save the configuration to apply during certificate delivery.
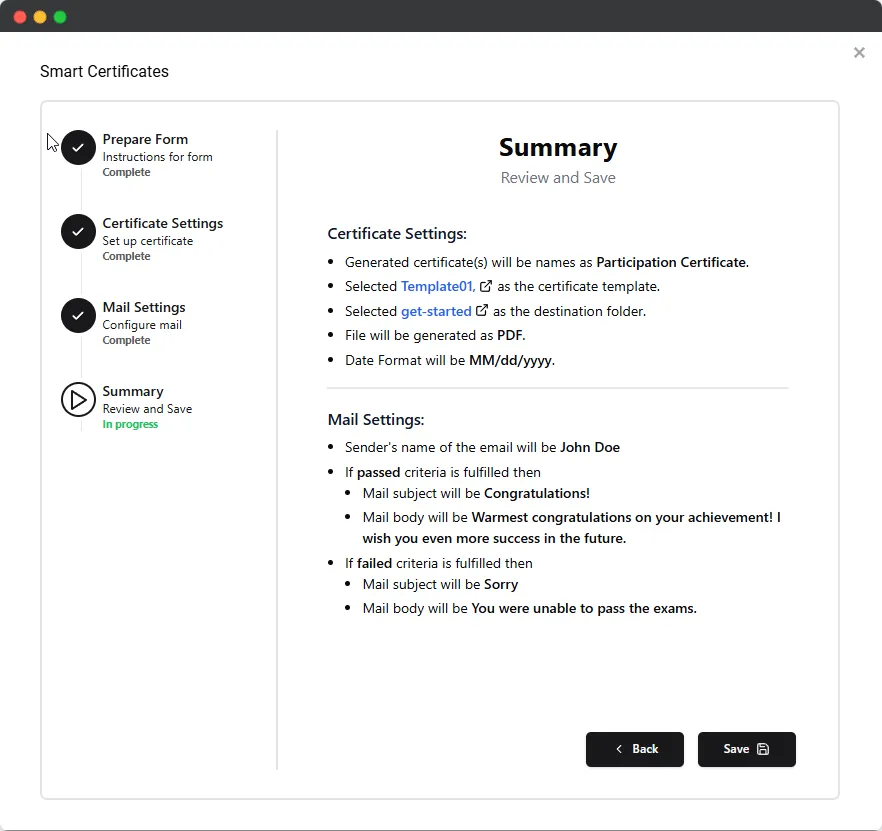
✅ Summary
- Review your configuration and Save it to finalize setup.
⚙️ How the Add-On Works
Once the form is submitted:
-
Smart Certificates calculates the score.
-
If the user passes, a personalized certificate is:
- Generated using your template
- Filled with mapped placeholders
- Emailed to the respondent
-
If the user fails, a custom failure email is sent (no certificate).
🎨 Template Gallery Feature
How to Use
-
Open the Gallery in Certificate Settings
-
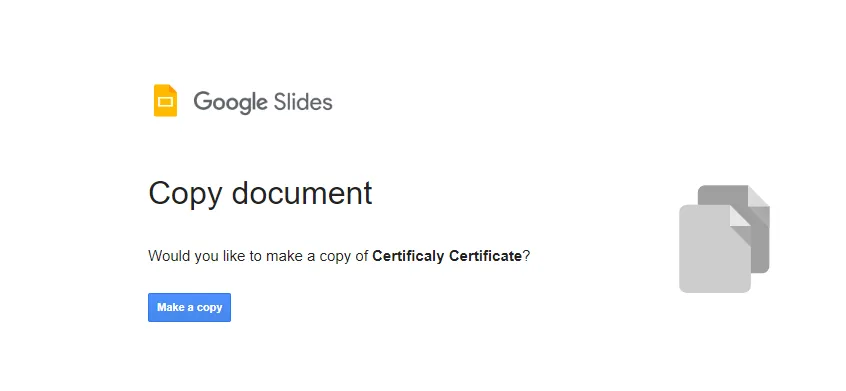
Choose a template and click the copy button
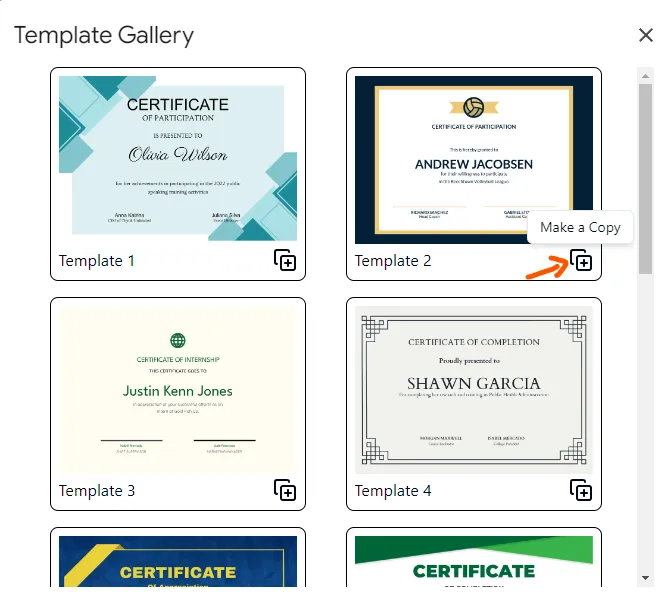
-
A new tab will open — click “Make a Copy” to save it to your Drive
-
Return to the add-on and select the copied file using the file picker
⚠️ Restricted Question Types (Do Not Use for Quiz Scoring)
Smart Certificates does not support quiz scoring with the following question types:
- Paragraph
- Checkbox Grid
- Multiple Choice Grid
- Date
- Time
- Linear Scale